You will learn in this article how to partition a hard drive in windows 11, 10, 7 , Vista and XP using disk management. Define steps are similar for all Windows versions. You can partition only if unallocated or free space is available on the disk.
In case there is no unallocated or free space on disk space, you can still partition by making some space by performing the task of shrinking disk volume or deleting partition.
How to Partition Hard Drive?
- Open disk management as an administrator.
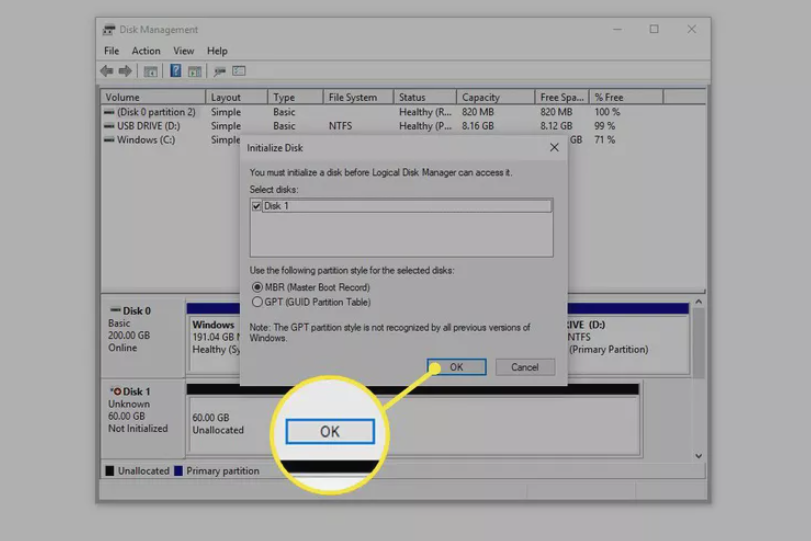
- When Disk Management opens, you should see an Initialize Disk window with the message “You must initialize a disk before Logical Disk Manager can access it.”
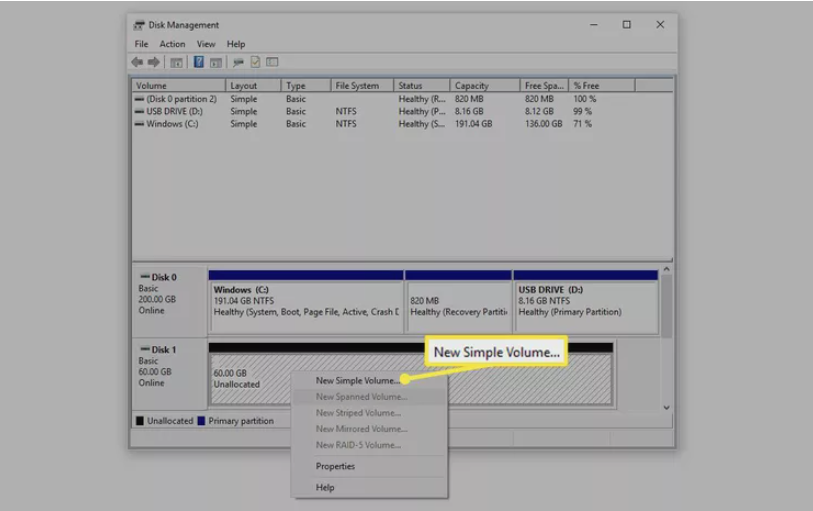
- Select Unallocated part of disk and then click on new simple Volume.
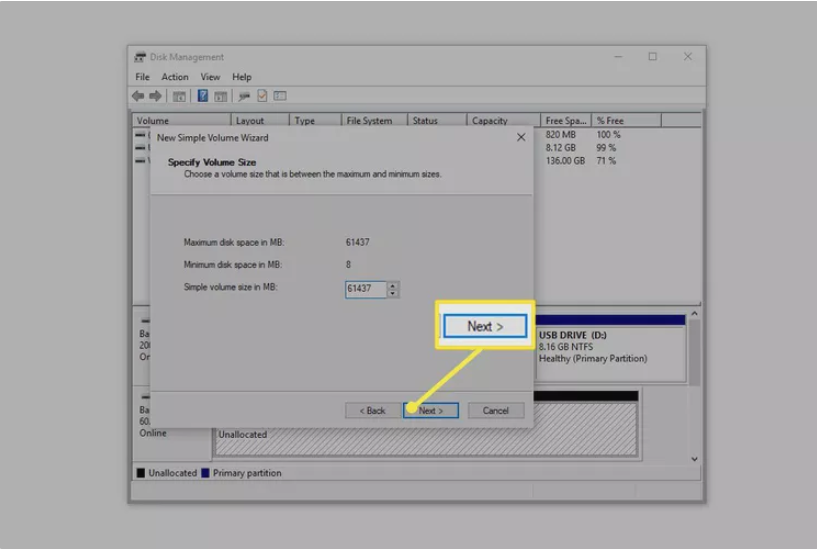
- Click Next in New Simple Volume Wizard

- Enter your desired size, but it should be lower than the unallocated volume.
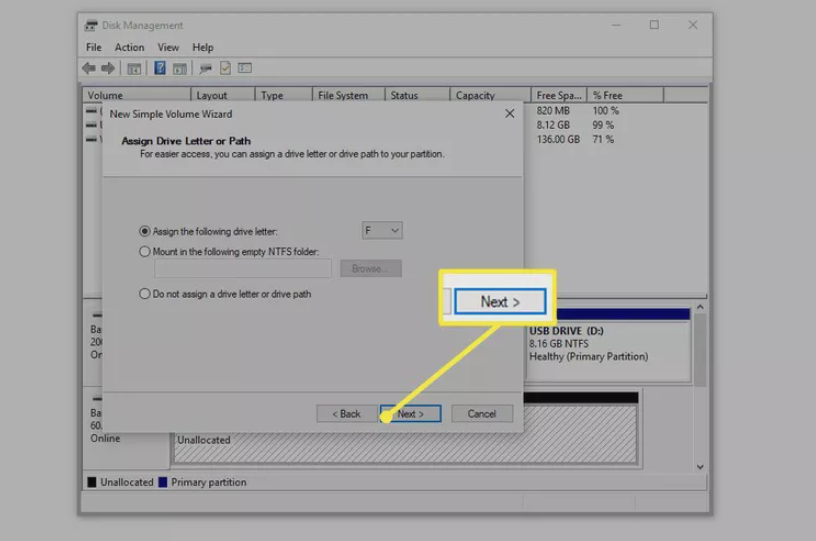
- Assign drive letter for new volume or choose default value assigned by system ( you can change drive letter any time) and click Next
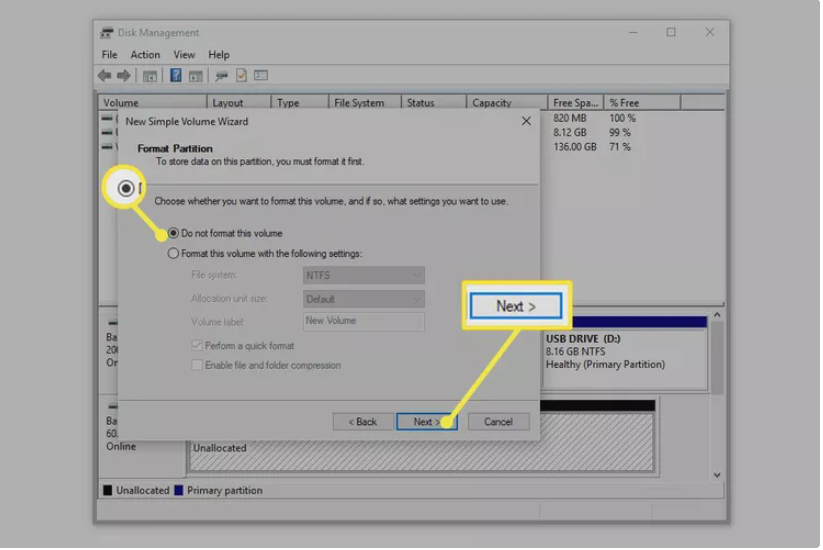
- Now there will be option to format drive, Do not choose format if you do not want to loose data
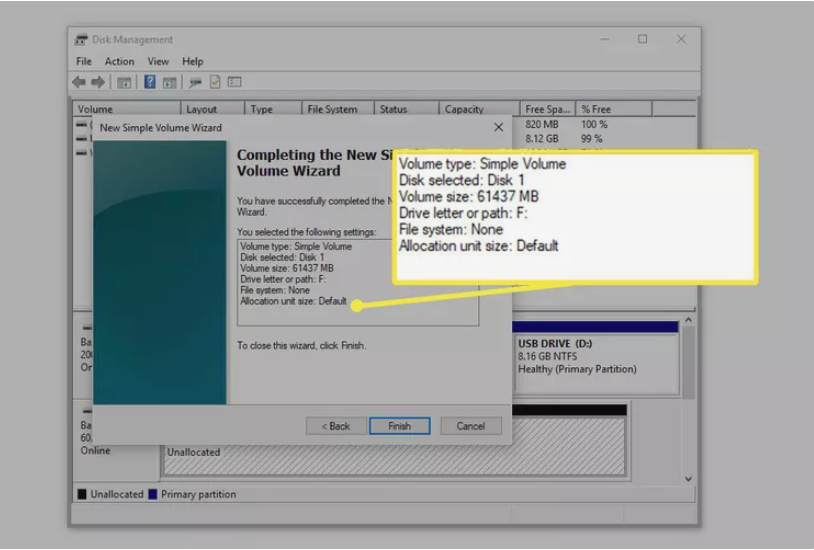
- Click Finish, and a disk partition is created.
Note : If you want create and format hard drive, be careful and check steps before you process it. or else you may lose data.